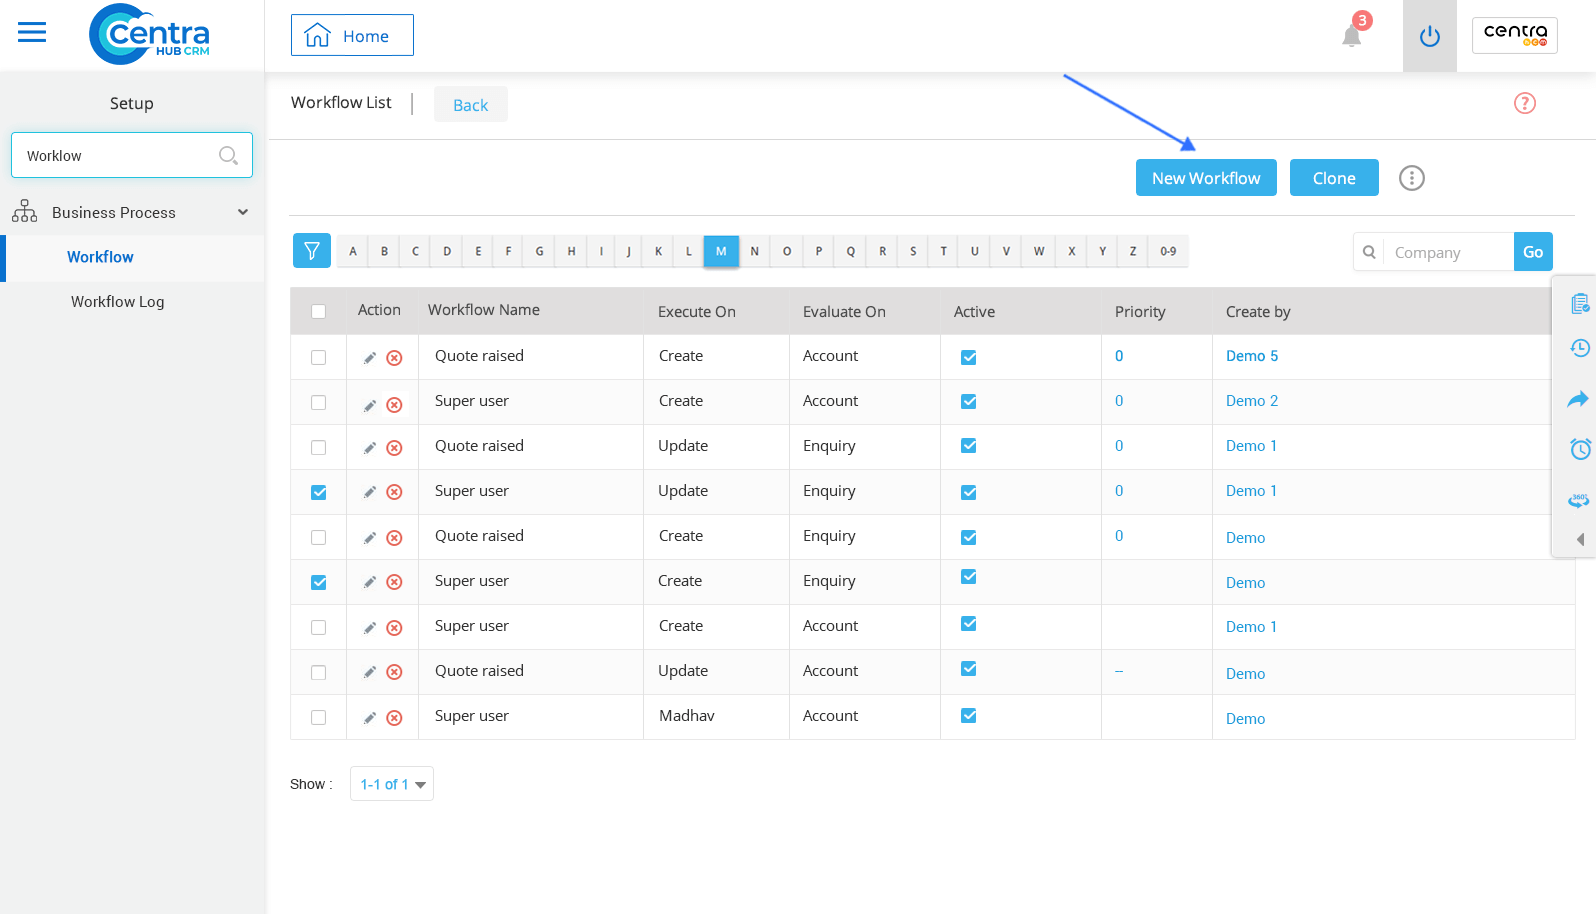

1. Access the CentraHub CRM settings and type ‘Workflow’ in the search.
2. Click on Workflow to create a New Workflow.
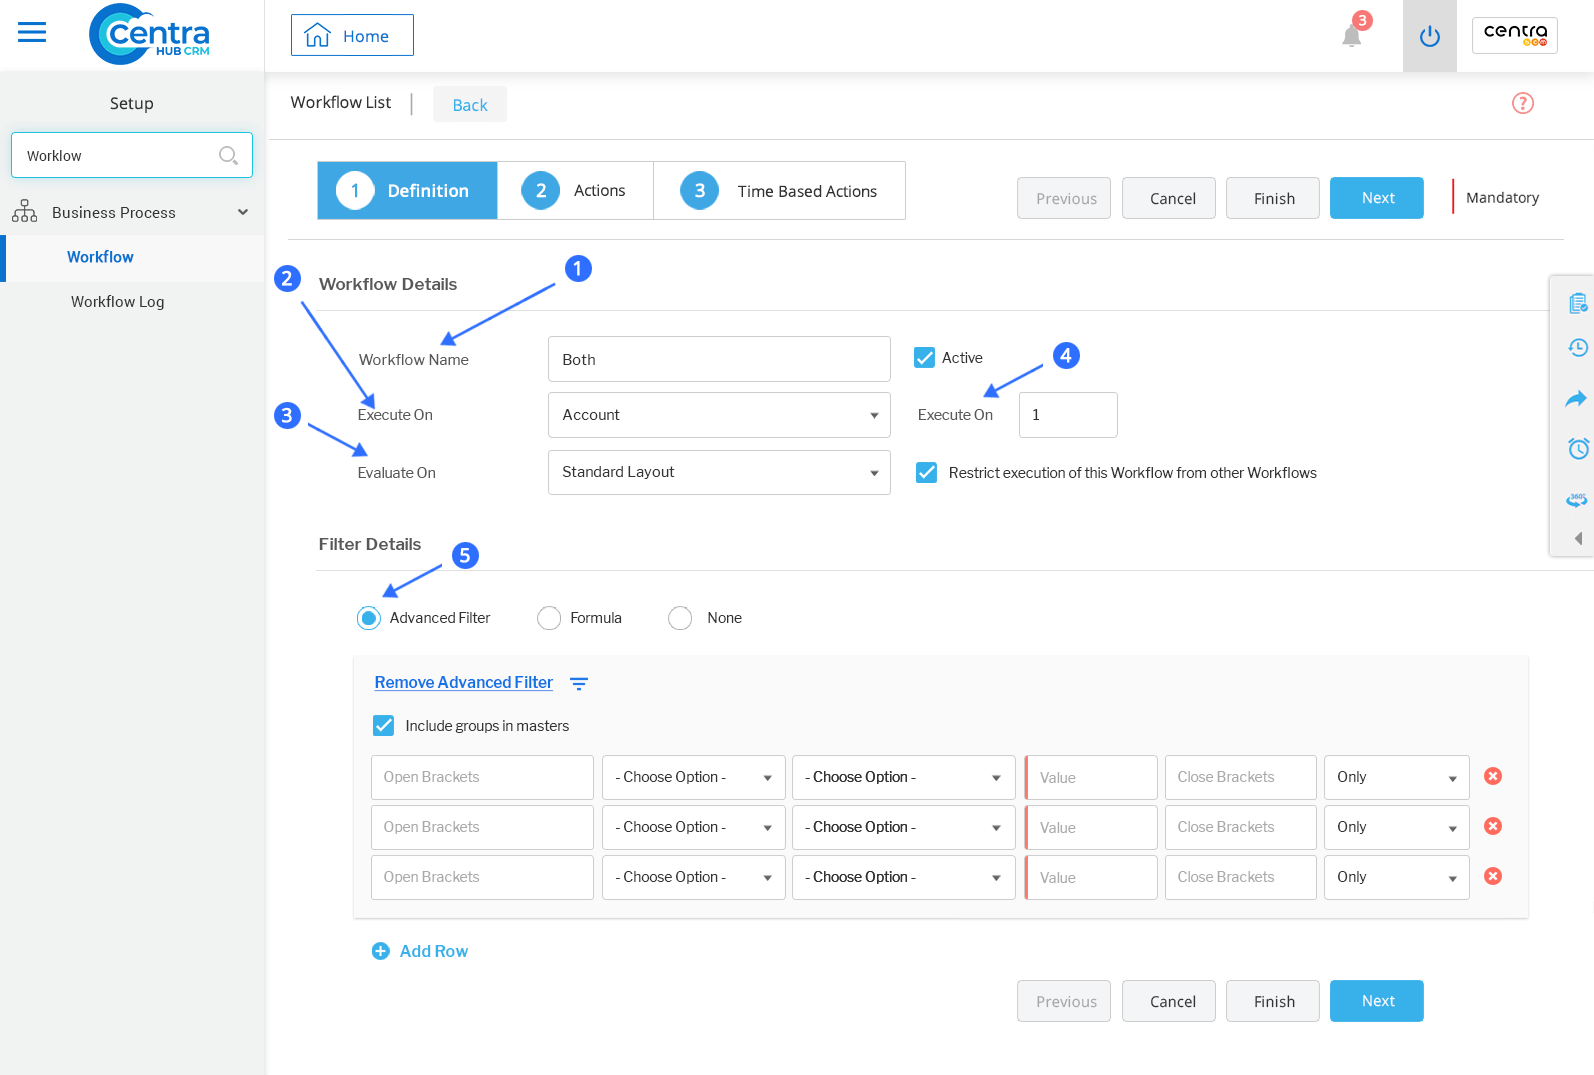
3. On the Workflow list page, enter the relevant details.
Define the workflow for Email Notifications.
Specify the name of the Workflow to be automated. (In this case it is Scheduling mass Email)
Refers to the Module to which Workflow has to be linked.
Refers to the condition on which on the Workflow has to be automated. (To Schedule Mass Mail on a Periodic basis, Select the Periodic option and Define Frequency template on a periodic basis).
Refers to the priority of execution of Workflow, if there are other Workflows linked to the same Module.
If Priority =1, then that WorkFlow is automated first.
If Priority =2, then that Workflow is automated on the second basis with respect to that Module.
Like ways Priority can be assigned to Workflow.
1. Email: Click Email on Workflow List page, to schedule mail for an individual user.
2. Template: Select Email Template from the Template dropdown list of Pop Up Email Window.
3A. From Address: Specify the From Email Address.
3B. CC: Specify Cc Email Address
To send an email internally, within you organization: Select ‘User Email’from the dropdown list of mail Field.
To send an email externally, outside of your organization - Select ‘Email’from the dropdown list of Email Field.
(ii)Email Address: Specify the Email Address (internal or external) to which the Email has to be sent.
4. Click OK. A pop-up window would open. Click on Finish to complete the process.
Get in touch with us for details on setup and additional custom services pricing
CONTACT US


